After the end of the begining, it's the begining of a new end
The euphoria of the previous week when we finished the foundations, carried us forward into the new week
It is certainly a better feeling, knowing that what gets constructed now is actually going to remain above ground.
The task for this week is to , assemble the timber frame for the outer walls, the wall posts are made from 150 x 48mm Pine or Spruce, the baseplate which it is fitted to is treated timber, again Pine or Spruce. A bonus job would be to get the floor layers in to do the garage and glass terrace area, that job is very much determined by the weather, if it's dry then we can go ahead with it, otherwise it will have to wait for better times.
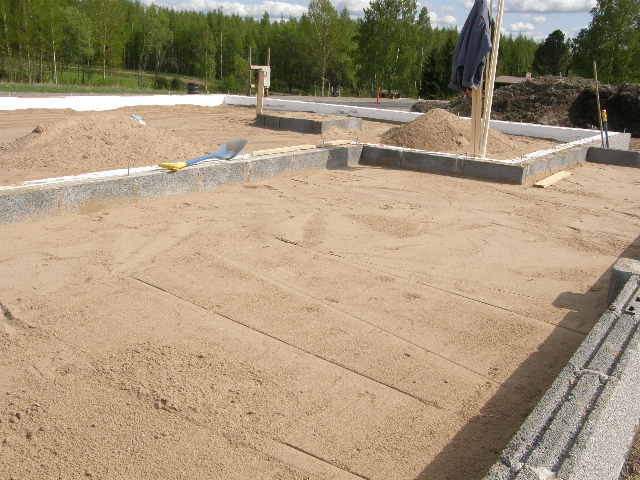
First task.
This plastic membrane is to direct the harmful Radon Gasses from the ground entering the walls of the building, it is designed to either direct it through the breezeblocks to the outside, or to force them into the Radon gas pipe in the underfloor and vent them out through the roof.

Baseplate cushion.

This is a soft neoprene based seal, purpose of which is to make an airtight seal between the baseplate and the foundations, 150 x 6 mm, It gets compressed when the base is bolted down.
Ready for baseplate.

Neoprene seal, radon gas seal, (which also doubles as a damp proof course)
Closer view.

Baseplate in position, halflap joint for the continuation piece.

Halflap joint on baseplate.

Baseplate bolted down, now we can start on the construction proper.

You know, turn your back for 5 minutes and sure as anything, someone somewhere will just be itching to deliver something, Ok I blame myself for placing the original order, so it's my own fault
In this case it was all the timber requirements for the first part of framing the house, this consisted of,
150 x 48mm planed timber for the uprights. About 300 metres
48 x 48mm for roof battens and also internal battens. About 1500 metres
300 x 51mm kertopuu (thick construction plywood) support beams 12m
200 x 51mm same stuff 24m
315 x 95mm massive timber beam, roof support at glass terrace, 12m
95 x 95mm massive timber pillar posts, supports for roof, 27m
100 x 22mm sawn timber for general use in supports etc.
2500 x 1200 x 25mm weatherboard, for cladding the walls after assembly.
This is only the first installment of timber, enough for the completion of the shell.
Frame timber

Battens, pillars and weatherboards

First order of business, check the measurements, as I am about to start cutting all the wall posts, in this case they are 2.65m long, the load bearing walls require about 20 each side.
Chopping the posts.

I started with ten fingers, long may it continue.

First posts chopped to the required length

Next part of the process is to cut the rebate line on the posts, this is 200mm long and 51mm deep, inserted into the rebate is the ´kertopuu´´ plywood, this is to give the structure it's loadbearing capability.
Sawing the rebate. the rebate will be sawn out in situ when the walls are up. using the laser building level I can mark on each post the exact cutting point, this alleviates the worry about the foundations not being exactly straight and true

rebating

Start point.
Started off with doing the long straight wall, any measurements to be taken we will use this wall as the guide.

Up and supported, in this case I used about 8 nails per post length of nail 95mm, not done by hammer but by the use of a compressed air nail gun

Joni (Our son) and Ari fitting the posts for the gable end, using the nailgun.

Checking it is straight and true before attaching it to the temporary supports

Cutting out of the rebate, the kertopuu will be fitted into this part.

Kertopuu fitted and upper plate fitted on top, the wall has all the strength it needs now to support the roof trusses.

Detail, inner kertopuu, 200 x 51, outer kertopuu 300 x 51. the larger kertopuu is only fitted over extremely wide openings, in this case the living room window and outer door.

Internal corner, kertopuu is nailed to the gable ends corner post, giving extra stability.

Long back wall and northern gable wall attached together.

Well, I guess we got lucky, the weather stayed fine and the floor specialist arrived to do their thing. Which in our case was to lay the concrete floor in the garage and in the houses glass terrace area
Pouring out the concrete floor mix, altogether floor and terrace will take 6 cubic metres of mass.

First he fills in the corners, setting the height using a laser level. then works his way all the way around.

Using his ´´Linjari´´ it's an aluminium tool for levelling and checking surfaces are straight, he proceeds to level out the floor, you need a good sense of balance in this job, too much pressure on one side will entail you digging holes in the floor, not the desired result.

Garage floor, finished and smoothed, it has to be kept wet for the next few days, as the concrete dries and squeezes the water out, it can shrink, to slow the process and avoid cracking we keep it dampened down, this is most important in the garage, as we had a special finish applied to it, a concrete topcoat of hardened material, this allows us to drive with our winter tyres without damaging or digging out the surface of the floor.


The terrace area, not so worried about shrinking or cracks here, as later on it will be getting tiled.

Terrace area

Threaded rod, 4 of these in the terrace pillars, it will be screwed down and the wooden pillars will be drilled and fitted on top, there is the mother of all washers and a bolt under the pillar, so it is adjustable, no unsightly pillar support in this case.

So another week and another dollar, next week we want to get all the window boxes fitted, door frames, roof trusses, final supports on the frame and make a start on getting it weatherproof.
It is certainly a better feeling, knowing that what gets constructed now is actually going to remain above ground.
The task for this week is to , assemble the timber frame for the outer walls, the wall posts are made from 150 x 48mm Pine or Spruce, the baseplate which it is fitted to is treated timber, again Pine or Spruce. A bonus job would be to get the floor layers in to do the garage and glass terrace area, that job is very much determined by the weather, if it's dry then we can go ahead with it, otherwise it will have to wait for better times.
First task.
This plastic membrane is to direct the harmful Radon Gasses from the ground entering the walls of the building, it is designed to either direct it through the breezeblocks to the outside, or to force them into the Radon gas pipe in the underfloor and vent them out through the roof.

Baseplate cushion.

This is a soft neoprene based seal, purpose of which is to make an airtight seal between the baseplate and the foundations, 150 x 6 mm, It gets compressed when the base is bolted down.
Ready for baseplate.

Neoprene seal, radon gas seal, (which also doubles as a damp proof course)
Closer view.

Baseplate in position, halflap joint for the continuation piece.

Halflap joint on baseplate.

Baseplate bolted down, now we can start on the construction proper.

You know, turn your back for 5 minutes and sure as anything, someone somewhere will just be itching to deliver something, Ok I blame myself for placing the original order, so it's my own fault
In this case it was all the timber requirements for the first part of framing the house, this consisted of,
150 x 48mm planed timber for the uprights. About 300 metres
48 x 48mm for roof battens and also internal battens. About 1500 metres
300 x 51mm kertopuu (thick construction plywood) support beams 12m
200 x 51mm same stuff 24m
315 x 95mm massive timber beam, roof support at glass terrace, 12m
95 x 95mm massive timber pillar posts, supports for roof, 27m
100 x 22mm sawn timber for general use in supports etc.
2500 x 1200 x 25mm weatherboard, for cladding the walls after assembly.
This is only the first installment of timber, enough for the completion of the shell.
Frame timber

Battens, pillars and weatherboards

First order of business, check the measurements, as I am about to start cutting all the wall posts, in this case they are 2.65m long, the load bearing walls require about 20 each side.
Chopping the posts.

I started with ten fingers, long may it continue.

First posts chopped to the required length

Next part of the process is to cut the rebate line on the posts, this is 200mm long and 51mm deep, inserted into the rebate is the ´kertopuu´´ plywood, this is to give the structure it's loadbearing capability.
Sawing the rebate. the rebate will be sawn out in situ when the walls are up. using the laser building level I can mark on each post the exact cutting point, this alleviates the worry about the foundations not being exactly straight and true

rebating

Start point.
Started off with doing the long straight wall, any measurements to be taken we will use this wall as the guide.

Up and supported, in this case I used about 8 nails per post length of nail 95mm, not done by hammer but by the use of a compressed air nail gun

Joni (Our son) and Ari fitting the posts for the gable end, using the nailgun.

Checking it is straight and true before attaching it to the temporary supports

Cutting out of the rebate, the kertopuu will be fitted into this part.

Kertopuu fitted and upper plate fitted on top, the wall has all the strength it needs now to support the roof trusses.

Detail, inner kertopuu, 200 x 51, outer kertopuu 300 x 51. the larger kertopuu is only fitted over extremely wide openings, in this case the living room window and outer door.

Internal corner, kertopuu is nailed to the gable ends corner post, giving extra stability.

Long back wall and northern gable wall attached together.

Well, I guess we got lucky, the weather stayed fine and the floor specialist arrived to do their thing. Which in our case was to lay the concrete floor in the garage and in the houses glass terrace area
Pouring out the concrete floor mix, altogether floor and terrace will take 6 cubic metres of mass.

First he fills in the corners, setting the height using a laser level. then works his way all the way around.

Using his ´´Linjari´´ it's an aluminium tool for levelling and checking surfaces are straight, he proceeds to level out the floor, you need a good sense of balance in this job, too much pressure on one side will entail you digging holes in the floor, not the desired result.

Garage floor, finished and smoothed, it has to be kept wet for the next few days, as the concrete dries and squeezes the water out, it can shrink, to slow the process and avoid cracking we keep it dampened down, this is most important in the garage, as we had a special finish applied to it, a concrete topcoat of hardened material, this allows us to drive with our winter tyres without damaging or digging out the surface of the floor.


The terrace area, not so worried about shrinking or cracks here, as later on it will be getting tiled.

Terrace area

Threaded rod, 4 of these in the terrace pillars, it will be screwed down and the wooden pillars will be drilled and fitted on top, there is the mother of all washers and a bolt under the pillar, so it is adjustable, no unsightly pillar support in this case.

So another week and another dollar, next week we want to get all the window boxes fitted, door frames, roof trusses, final supports on the frame and make a start on getting it weatherproof.
posted by Jim Henderson at
03:31
0 Comments
![]()